Geetaji was known and loved for her clear, unequivocal and uncompromising advice, particularly in respect of yoga practice for women.
Question 1: What kinds of asanas and pranayama one can do safely during menstruation?
During menstruation, the first to the last day, which is about four to seven days, you need to focus on the practice of those asanas that help women to maintain health and do not interfere with the menstrual period. Asanas should be selected in such a way as to avoid wasting energy or creating hormonal disorders.
Stretching forward standing poses such as Adho Mukha Svanasana, Prasarita Padottanasana, Parsvotanasana should be possible, especially with support under your head. To better relax your stomach, you first need to bend back and then enter into the pose.
However, those who suffer from pain in the body, low blood pressure, weakness, a sharp drop in blood sugar level should avoid these postures.
Ardha Chandrasana and Utthita Padangustasana 2 help with profuse discharge, back pain and abdominal cramps. These two asanas should be given special consideration for sciatica or failing vertebral discs.
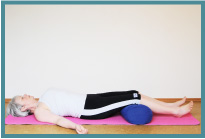
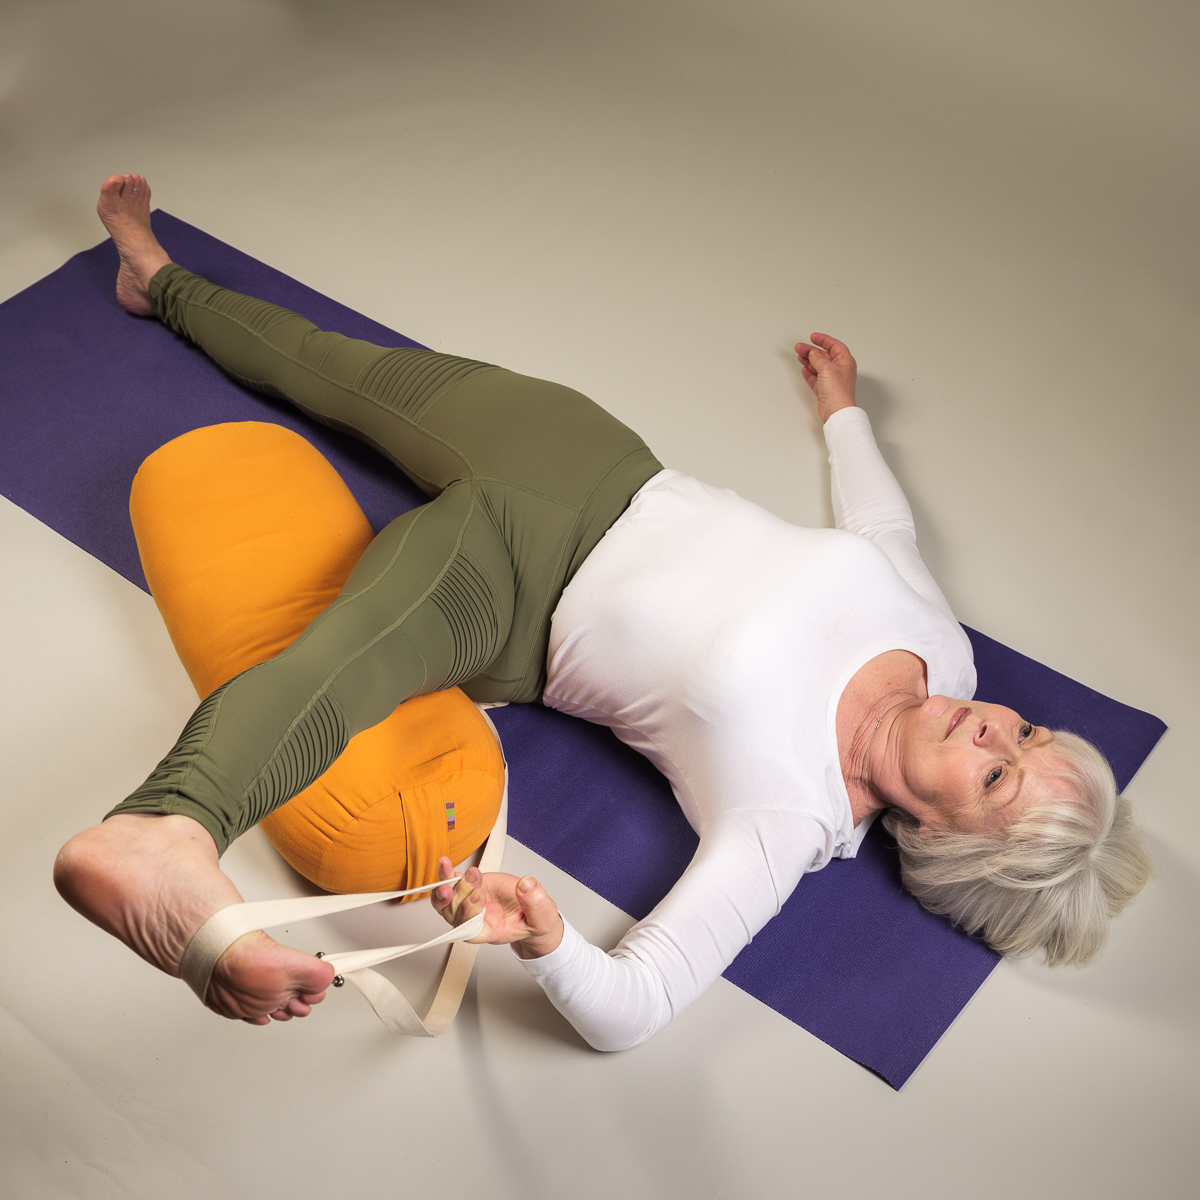
Supine poses such as Supta Virasana and Supta Baddha Konasana, Supta Sukhasana, Matsyasana and Supta Padangusthasana 3 (using belts, blankets and bolster) promote relaxation of muscle and nerve fibres, which in this period may be stretched and irritated. These poses also retain vitality. Those who suffer from shortness of breath, tightness in the chest, fluid retention, severe abdominal pain, irritability and impulsiveness will find that these asanas very effective.
Simple stretching forward as the Adho Mukha Virasana, Adho Mukha sukhasana, Janu Sirsasana, Triang Mukhaikapada Pashchimottanasana, Ardha Padma Baddha Pashchimottanasana, Marichyasana 1, Parsva Upavishtakonasana, Adho Mukha Upavishtakonasana (all performed passively) will control the discharge of blood, soothe the stomach and give the rest of the brain cells. These asanas help those who suffer from headaches, back pain, heavy bleeding, abdominal cramps and fatigue.
Sitting postures such as Sukhasana, Virasana, Padmasana, Baddhakonasana, Upavishtakonasana, Gomukhasana, Mulabadhasana etc. help to eliminate tension and stress. By soothing the feet, these asanas also calm the brain.
During menstruation there is no need to rush to meet a daily training program, which you might be following in the remaining days of your cycle. Pay more attention to the knee, popliteal knee ligaments, ankles and toes.
Relaxation and stretching of the joints make them more elastic and less dry (released natural lubricant) and reduces pain. In addition, women with arthritis, can work with the shoulders, elbows, wrists, performing Parsva Baddha Hastasana, Pashchima Namaskarasanu, Gomukhasanu (for hands), the rope 1 for shoulders and those who cannot do Virasana or Padmasana, can
concentrate on the knee bending poses.
Thus, although you will not deal with the usual intensity, time will not be wasted. You can achieve significant results in the emancipation of the joints, as the slow, gradual and non-aggressive impact is most profound and effective. The body and the nervous system will get much-needed rest. Viparita Dandasana and Setubandha Sarvangasana energize and stimulate the chest, lungs, heart and maintain hormonal balance in the endocrine system. You can do Savasana, Ujjayi pranayama and Viloma in
Savasana.
If your period is painless, no headaches, irritability, stress, asthma attacks, depression, you can do Ujjayi Pranayama and Viloma sitting. If you just want to take care of your health during menstruation, you can limit regular practice poses to suptine poses, stretching forward, Viparita Dandasana, Setubandha Sarvangasana and pranayama in Savasana. It takes less time, while the full program requires one and a half to two hours.
Question 2: What kinds of asanas and pranayama should be avoided?
Avoid inverted postures such as Adho Mukha Vrksasana, hand balances such as Bakasana, backbends such as Urdhva Dhanurasana, Kapotasana, “tying the body in a knot”, such as in Yoganidrasana, Eka Pada Sirsasana and abdominal compression in Navasana and Jathara Parivartanasana.
During this period it is better to abandon the practice of pranayama sitting, and if you do decide to do it that way, it should not take more than 15 minutes. Avoid Antara and Bahia Kumbaka, Uddiyana and Mula Bandha, Bhastrika, Kapalabhati and Maha Mudra.
Question 3: Which asanas can be done to women who are engaged by individual therapeutic programs?
This is a very broad topic, so only a few key points will be indicated here. If you have back problems, you can do standing poses, but stay in them less than usual, in order not to get tired. Care must be taken to ensure proper support of the back, chest, legs, etc., so as not to overload the particularly sensitive or damaged parts of the spine. If problems with the shoulders, neck and back is necessary to work with ropes, definitely needs support. You can do the twisting sideways like Bharadvajasana and
Marichyasana 1 as the stomach is not compressed. The remaining twists may cause excessive compression and exert pressure on the ovaries, uterus and vagina. In this regard, these asanas should be avoided.
The rest of the asanas prescribed for this time may be carried out, if they are not contraindicated for existing problems.
Question 4: Why are inverted poses avoided during menstruation?
If you do inverted postures during menstruation, this will prevent the discharge of blood. Those who tried to do so from the enthusiasm or disdainful attitude toward themselves, noticed that the bleeding is stopped abruptly. This is definitely bad for your health and can lead to the appearance of fibroids, cysts, endometriosis. This practice has had a devastating effect on the body.
According to Ayurveda, all that needs to be derived from the body, should not linger inside. You cannot delay the menstrual blood as well as cannot hold urine, faeces or mucus. These substances are called low – waste that must be removed. Their delay within the body leads to all kinds of diseases. During menstruation should also limit physical activity, including walking, dancing, heavy housework. The body needs rest and relaxation.
Inversions have a number of features. As mentioned above, they delay menstrual bleeding. However, during pregnancy they are not only safe, but also useful for the health of the woman and the foetus. These asanas are a boon for women prone to miscarriages.
If your period continues for more than 15 days, after 12 days, you can start doing inverted poses, despite the continued bleeding. It is necessary to know the cause of prolonged and heavy bleeding and solve this problem with other asanas during the absence of menstruation. If bleeding occurs during ovulation, the inversions are shown as a medicine.
At the end of the menstrual cycle, start again with the practice of inverted postures. They have a strong health effects on the reproductive system and quickly restore hormonal balance.
In conclusion, once again it should be emphasized that on the basis of what we know today about the effects of inverted postures, they should not be performed during menstruation. If out of stubbornness or inflexibility, you still going to do it, sooner or later you will have to pay for it.
Question 5: Is it safe to do inversions after the third day of menstruation during their own practice or workshops?
A woman should not ask such silly questions. Bleeding must be stopped completely, and end naturally. It is not a matter of three or four days. Regardless of whether it’s a seminar or convention, you must first take care of their health. Once the bleeding has stopped, begin to practice inverted postures. Do not move sharply to the standing poses, backbends and balancing, etc. Remember that you have just given birth since menstruation is called the funeral of the unborn child.”
With gratitude and thanks to Geeta S Iyengar.
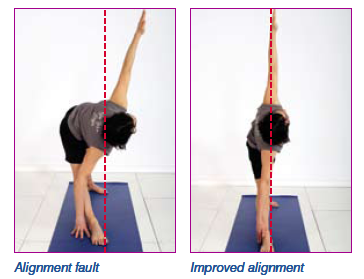
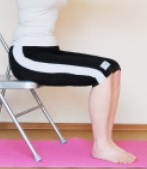 Here’s a quick and easy example – are you sitting comfortably? Consider the position of the front and back of your lower trunk. The position of the pelvis is the critical factor in supporting the weight of the abdomen: everything else, including ‘core strength’, is secondary. So here’s a test for you. Lift your pubic bone up at the front and draw the back of the pelvis (your Sacrum bone) down. Now roll your shoulders back and lift your navel area up and slightly back. It shouldn’t feel hard – this is not about creating a six-pack, which incidentally could just as easily pull a weak lower back out of alignment.
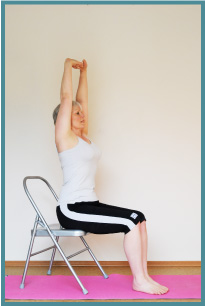 Sitting – try the same alignment sitting on a chair. Draw your navel back towards your spine, lift your chest and take your shoulders back. Feel better? What you have just done is to lift your lower abdomen up and lengthen your lower back down, which levels the bones of your pelvis and puts the weight of the abdomen into the ‘bowl’ of the pelvis, where it belongs, instead of dropping over the front of your pubic bone and giving you a belly!Lifting your chest and taking your shoulders back makes more space around the front and back of your abdomen, keeping this girdle of muscles firm, and of course relieving the pressure on your digestive organs. REMEMBER: this is not about creating a hard abdomen: it’s about realigning the skeleton-muscular structure.
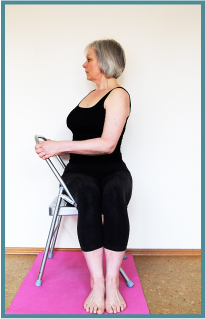 Bharadvajasana – sit sideways on the chair, feet flat on the floor and knees pressed together, with the back of the chair to your right. (If your feet don’t reach the floor, place a block under your feet.) Repeat the abdominal lift as above. Then, keeping your knees and hips steady, turn your trunk towards the back of the chair and hold with both hands. Keeping your knees and thighs together, push gently with the right hand and pull with the left, so your trunk turns and your spine revolves.Keep your shoulders level, breathe steadily, and keep your chin in line with your breastbone. Hold for 3 breaths. Slowly turn to the front and pause for a breath. Swivel round on the seat so the back of the chair is now on your left. Repeat to the right and left once more, pausing between each twist. (Ladies: Miss this one out if you have your period.)
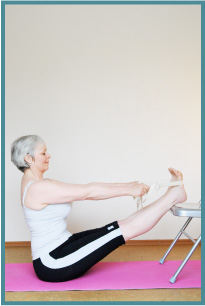 Navasana – face the seat of your chair. One at a time place your heels on the seat, holding a strap round the soles of your feet. Begin to straighten your legs. Tightening your kneecaps and extend the backs of your legs, pushing your heels away, and pulling on the strap with your hands. Learn to lift your chest, waist and lower back away from the floor. Keep your head, neck and face relaxed. Breathing evenly and smoothly, hold for 3-5 breaths.Relax the pose, bring your feet down if you need to, then repeat twice more, rolling your shoulders back as you lift your chest. Try to perch on your buttock bones! If you find the chair too high to start with, use a wall and gradually work your way up to chair height.
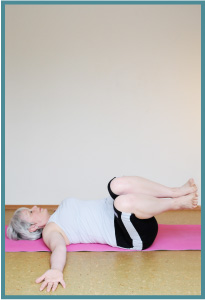 atthara Parvatasana – lie down on your mat. Bring your knees up over your chest and push gently into your heels, keeping your legs firm, your feet and knees gripped together. Place your arms on the floor, straight out at shoulder height, backs of the hands to the floor. Keeping your knees together (that’s the tricky part!) and well bent, roll them slowly to your right and left, keeping a slow and steady rhythm to the movement and the breathing. Keep your face and jaw relaxed.Repeat this three times on each side, then rest with your feet hip width apart on the floor, knees bent and together. Repeat for three each side again.
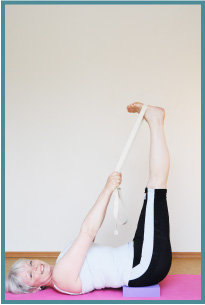 Urdhva Prasarita Padasana –lie down on your mat with your knees bent up. Lift your hips and put a yoga block under your sacrum. Bend your knees over your chest and put a strap over the balls of your feet, holding one end in each hand. Breathe in. As you breathe out push your heels up towards the ceiling, keeping your feet together and aiming to straighten your legs. The shorter your hamstrings, the more challenging this will feel.Hold this ‘L’ shape for 2-3 breaths, and then bring your knees back down to your chest on an exhalation. Rest for 2 breaths. Repeat this three times. If you find it difficult to straighten your legs, take your legs and feet further away from your face by using a longer strap. Experiment until you find an angle at which your legs feel comfortably straight, backs of the knees open. You can also rest your heels on a wall, as with Navasana. Finally put your feet down on the floor hip-width apart, knees bent and together, to allow your abdominal muscles to rest. Eventually, lift your hips and slide the block out, and rest your back on the mat.
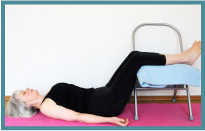 Legs over a Chair – lie with your back on the floor and your legs resting over the seat of the chair. (Put the chair sideways so you have room for your feet.) The edge of the seat should come right into the backs of your knees, so your calves rest completely on the seat. If you are less than 5’6” you might be more comfortable with a yoga block under your sacrum. If you are over 5’9”, you will find a well folded blanket on the chair seat more comfortable. Your thighs should be slanting slightly away from the chair. This particular pose relived a tight lower back and relaxes the spinal muscles.